How to Use Datepicker in Flutter
Its not too tough, really.
We are going to create a very simple project to demonstrate the use of the datepicker, in particular the material datepicker.
If you prefer the video version, you can watch it below.
Suggested readings
Lets see how its going to look.
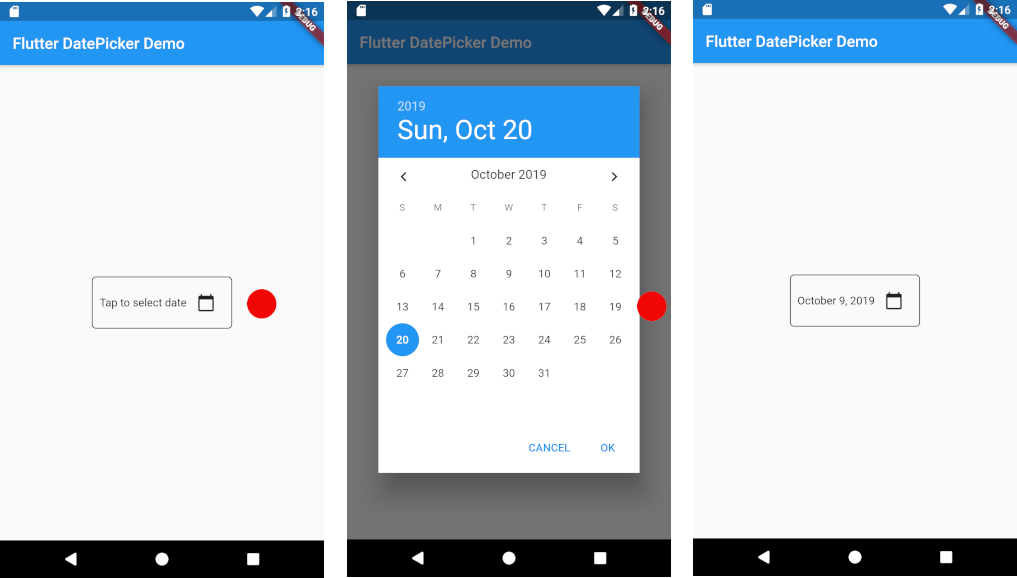
It just consists of a text and an icon button. They are enclosed in a BoxDecoration to make it look a bit good.
Flutter already provides a ready function, showDatePicker. We just have to use it. We can show the dialog when the user taps on any widget. If we are using the IconButton then, we could use code like this:
. . .
. . .

IconButton(
    icon: Icon(Icons.calendar_today),
    tooltip: 'Tap to open date picker',
    onPressed: () {
        showDatePicker(
            context: context,
            initialcreated: DateTime.now(),
            firstcreated: DateTime(2015, 8),
            lastcreated: DateTime(2101),
            );
        },
),
. . .
. . .
This code will simple show the datepicker dialog. The selected date in the dialog is set to today. Maximum date that can be select is 31 Dec 2021 and minimum is 1 Jan 2015.
But this code does not do anything meaningful, clicking ok in the dialog will simply dismiss the dialog.
Let’s go back to the method definition of showDatePicker.
Future<DateTime> showDatePicker
({
BuildContext context,
DateTime initialDate,
DateTime firstDate,
DateTime lastDate,
SelectableDayPredicate selectableDayPredicate,
DatePickerMode initialDatePickerMode: DatePickerMode.day,
Locale locale,
TextDirection textDirection,
TransitionBuilder builder
})
Official documentation says:
The returned Future resolves to the date selected by the user when the user closes the dialog. If the user cancels the dialog, null is returned.
This simply means that the dialog is asynchronous. We want to write the selected date into the text widget.
Lets write a function to display and get the selected date.
Future<void> _selectDate(BuildContext context) async {
    final DateTime d = await showDatePicker( //we wait for the dialog to return
      context: context,
      initialcreated: DateTime.now(),
      firstcreated: DateTime(2015),
      lastcreated: DateTime(2020),
    );
    if (d != null) //if the user has selected a date
      setState(() {
        // we format the selected date and assign it to the state variable
        _selectedDate = new DateFormat.yMMMMd("en_US").format(d);
      });
  }
Now going back to the earlier code block of IconButton and update the code.
. . .
IconButton(
    icon: Icon(Icons.calendar_today),
    tooltip: 'Tap to open date picker',
    onPressed: () {
       _selectDate(context);
),
. . .
That’s it.
Below is the entire code. The project consists of only one file and one screen.
import 'package:flutter/material.dart';
import 'package:intl/intl.dart';
void main() => runApp(MyApp());
class MyApp extends StatelessWidget {
// This widget is the root of your application.
Widget build(BuildContext context) {
return MaterialApp(
title: 'Flutter DatePicker Demo',
theme: ThemeData(
primarySwatch: Colors.blue,
),
home: MyHomePage(title: 'Flutter DatePicker Demo'),
);
}
}
class MyHomePage extends StatefulWidget {
MyHomePage({Key key, this.title}) : super(key: key);
final String title;
_MyHomePageState createState() => _MyHomePageState();
}
class _MyHomePageState extends State<MyHomePage> {
String _selectedDate = 'Tap to select date';
Future<void> _selectDate(BuildContext context) async {
final DateTime d = await showDatePicker(
context: context,
initialcreated: DateTime.now(),
firstcreated: DateTime(2015),
lastcreated: DateTime(2020),
);
if (d != null)
setState(() {
_selectedDate = new DateFormat.yMMMMd("en_US").format(d);
});
}
Widget build(BuildContext context) {
return Scaffold(
appBar: AppBar(
// Here we take the value from the MyHomePage object that was created by
// the App.build method, and use it to set our appbar title.
title: Text(widget.title),
),
body: Center(
// Center is a layout widget. It takes a single child and positions it
// in the middle of the parent.
child: Row(
mainAxisAlignment: MainAxisAlignment.spaceAround,
children: <Widget>[
Container(
decoration: const BoxDecoration(
border: Border(
top: BorderSide(width: 1.0, color: Colors.black),
left: BorderSide(width: 1.0, color: Colors.black),
right: BorderSide(width: 1.0, color: Colors.black),
bottom: BorderSide(width: 1.0, color: Colors.black),
),
borderRadius: BorderRadius.all(Radius.circular(5))
),
child: Padding(
padding: const EdgeInsets.all(8.0),
child: Row(
mainAxisAlignment: MainAxisAlignment.spaceAround,
children: <Widget>[
InkWell(
child: Text(
_selectedDate,
textAlign: TextAlign.center,
style: TextStyle(color: Color(0xFF000000))
),
onTap: (){
_selectDate(context);
},
),
IconButton(
icon: Icon(Icons.calendar_today),
tooltip: 'Tap to open date picker',
onPressed: () {
_selectDate(context);
},
),
],
),
),
),
],
),
),
);
}
}
The entire project is on github.